Why You Might Want to Shoot Aurora at ISO 100

When I wrote my first article about photographing the northern lights, I skipped one part almost completely: ISO.
That was not because ISO does not matter. It does. But the more I photographed aurora over the years, the more I felt that a lot of advice on this topic is too simple. You often read that you should use ISO 1600, ISO 3200, or even ISO 6400 in dark conditions. And yes, that can work. But in many real-world situations, it is higher than necessary.
My own view today is different: many photographers are using more ISO than they need. Especially with modern cameras, that can cost highlight detail in the aurora itself.
The problem is simple. A high ISO makes the preview on the back of the camera look bright and pleasing. But that does not mean it is the best RAW file. If your camera has strong dynamic range and is reasonably ISO-invariant, a lower ISO often gives you more room in the highlights while still letting you lift the image later in post.
So this article is not a call to always shoot aurora at ISO 100. The title is a bit provocative on purpose. It is a reminder that "use ISO 3200" is not a law of nature. On some cameras, even ISO 100 can be a perfectly valid choice. On others, ISO 400, 640, 800 or 1000 may be the more practical starting point.
Quick takeaway for beginners
If you are new to aurora photography, here is the short version:
- Do not assume that ISO 3200 or 6400 is the default best choice.
- Start lower, often around the upper gain stage of your camera or a bit above it.
- For many modern cameras, ISO 400 to 1000 is already enough.
- Raise ISO only when the aurora stays weak and your histogram still shows enough room.
- Shoot RAW. This whole approach depends on the flexibility of RAW files and does not translate the same way to JPEG.
If you want the deeper explanation, keep reading.
Why high ISO is often overrated for aurora
There is one good reason why so many photographers end up at ISO 3200 or 6400: the image on the camera screen looks better right away. It is easier to judge. It is easier to focus. It feels safer in the field. And when the aurora is weak, it is tempting to brighten the file as much as possible in-camera.
But there is a trade-off. If you push ISO several stops higher than necessary, you give away highlight headroom. That is exactly the part of the image that matters when the aurora suddenly gets stronger or when bright structures appear inside the curtains.
This is where many otherwise good aurora files break apart. The foreground may still look dark. The overall frame may look "correct" on the display. But the brightest parts of the aurora are already close to clipping, or fully clipped, and that fine structure is gone.
That is why I now prefer to stay lower by default. I would rather lift the file later than burn the best part of the sky during capture.
What ISO changes, and what it does not
ISO does not make the sensor collect more light. Aperture and shutter speed do that. ISO mainly changes how the recorded signal is amplified. In practice that means a higher ISO can make the file look brighter, but it also reduces the room you have left in the highlights.
With older cameras, raising ISO sometimes brought a more obvious benefit in the shadows. With many modern cameras, especially once you are around the higher gain stage of the sensor, the difference becomes much smaller than many people think. That is why the old advice to keep pushing ISO upward is not always the smart move anymore.
Again, this article is about RAW shooting. If you shoot JPEG, the camera is already making many decisions for you, and heavy exposure lifting later is much less forgiving.
The stop math matters
One reason I think this topic gets misunderstood is that photographers often talk about ISO values, but not about stops. Once you convert those ISO jumps into stops, the trade-off becomes easier to see.
- ISO 800 to ISO 1600 = +1 stop
- ISO 800 to ISO 3200 = +2 stops
- ISO 800 to ISO 6400 = +3 stops
So if you move from ISO 800 to ISO 6400, you are effectively giving away about three stops of highlight headroom compared with the lower setting. On a camera that is fairly ISO-invariant in that range, the shadow benefit may be small, but the highlight cost is very real.
The same logic also works the other way around. If I shoot a RAW file at ISO 800 and then lift it by five stops in post, I land in the same brightness ballpark as a capture at ISO 25,600. That does not mean every camera behaves identically at those settings, and it does not mean there is never a reason to raise ISO. But it shows how much room modern RAW files can have when the sensor is good and the exposure is handled carefully.
For aurora photography, that matters a lot. You usually care far more about keeping structure in the brightest parts of the lights than about getting a cheerful preview on the LCD.
So why ISO 800 so often?
For many current cameras, a practical sweet spot is somewhere around the upper gain stage of the sensor or a little above it. That is why I often end up around ISO 800 to 1000. It gives me a usable preview, enough flexibility in the field, and more protection for the highlights than the common ISO 3200 or 6400 advice.
But there is no universal aurora ISO. It depends on the camera. That is exactly why generic recommendations are so misleading.
If you want to go deeper into the sensor side of the story, Alex Cooke wrote a useful explainer about dual gain ISO on Fstoppers, and the charts on Photons to Photos are extremely helpful to compare cameras.
| Camera | Useful reference ISO | Comment |
|---|---|---|
| Nikon Z7 II | ISO 400 | Good example that the sensible starting point can be much lower than many aurora guides suggest. |
| Nikon Z6 II | ISO 800 | A very practical value for this approach and close to where I would start in many situations. |
| Nikon D750 | ISO 100 technically, ISO 400 to 800 in practice | My extreme example. The camera is so close to ISO-invariant and does not have a dual-gain sensor that even very low ISO can work, though a moderate compromise helps the preview. |
| Canon EOS R6 II | ISO 400 | Another reminder that "ISO 3200 by default" makes little sense across systems. |
| Fuji X-Pro3 | ISO 500 | Even here, the interesting range is far below the usual aurora folklore. |
| Sony a6700 | ISO 320 | Shows again that camera-specific behavior matters more than rules repeated on social media. |
| Sony A7 III | ISO 640 | Still much lower than the numbers many photographers jump to at night. |
Important: treat these as useful reference points, not as fixed commandments. Check your own camera on Photons to Photos and test it yourself.
Shutter speed comes first, not ISO
When photographers say they need higher ISO for weak aurora, they are often mixing up two different things: brightness and movement. The more important decision is usually shutter speed.
| Situation | Main priority | Practical consequence |
|---|---|---|
| Slow and bright aurora | Keep structure in the lights | Use a shorter shutter speed. There is rarely a good reason to push ISO very high here. |
| Slow and weak aurora | Collect more light | A somewhat longer shutter speed is usually the first option before jumping several stops in ISO. |
| Fast aurora | Freeze movement as much as possible | Use a shorter shutter speed. Raise ISO only if you really need it and the highlights still allow it. |
That is the key point. I do not keep ISO low because I love dark previews. I keep it low because it gives me flexibility. If the aurora suddenly becomes brighter, I do not have to react in panic and spin the ISO dial down three clicks while the best moment is already happening.
But what about the shadows?
That is the obvious question: if you keep ISO low to protect the highlights, do the shadows not become too dark?In most cases, the answer is no. With modern cameras, as long as you are shooting RAW and staying within the camera’s dynamic range, it usually makes almost no difference whether you brighten the shadows later in post or raise ISO in camera. In other words: for aurora photography, the dark foreground is usually not the real problem. Blown highlights in the aurora are.What I do recommend, especially when shooting aurora under a new moon, is taking one additional frame with a much longer exposure to gather more information in the shadows. Since you are already working on a tripod, this is easy to do. At the beginning or end of a series, just make one extra exposure of around one to two minutes for the foreground. Later, you can blend that frame with your aurora shot in Photoshop or Lightroom and get cleaner shadows without sacrificing detail in the brightest parts of the aurora.
My own examples
I have changed my own aurora workflow quite a bit over the years, and my files show the difference.
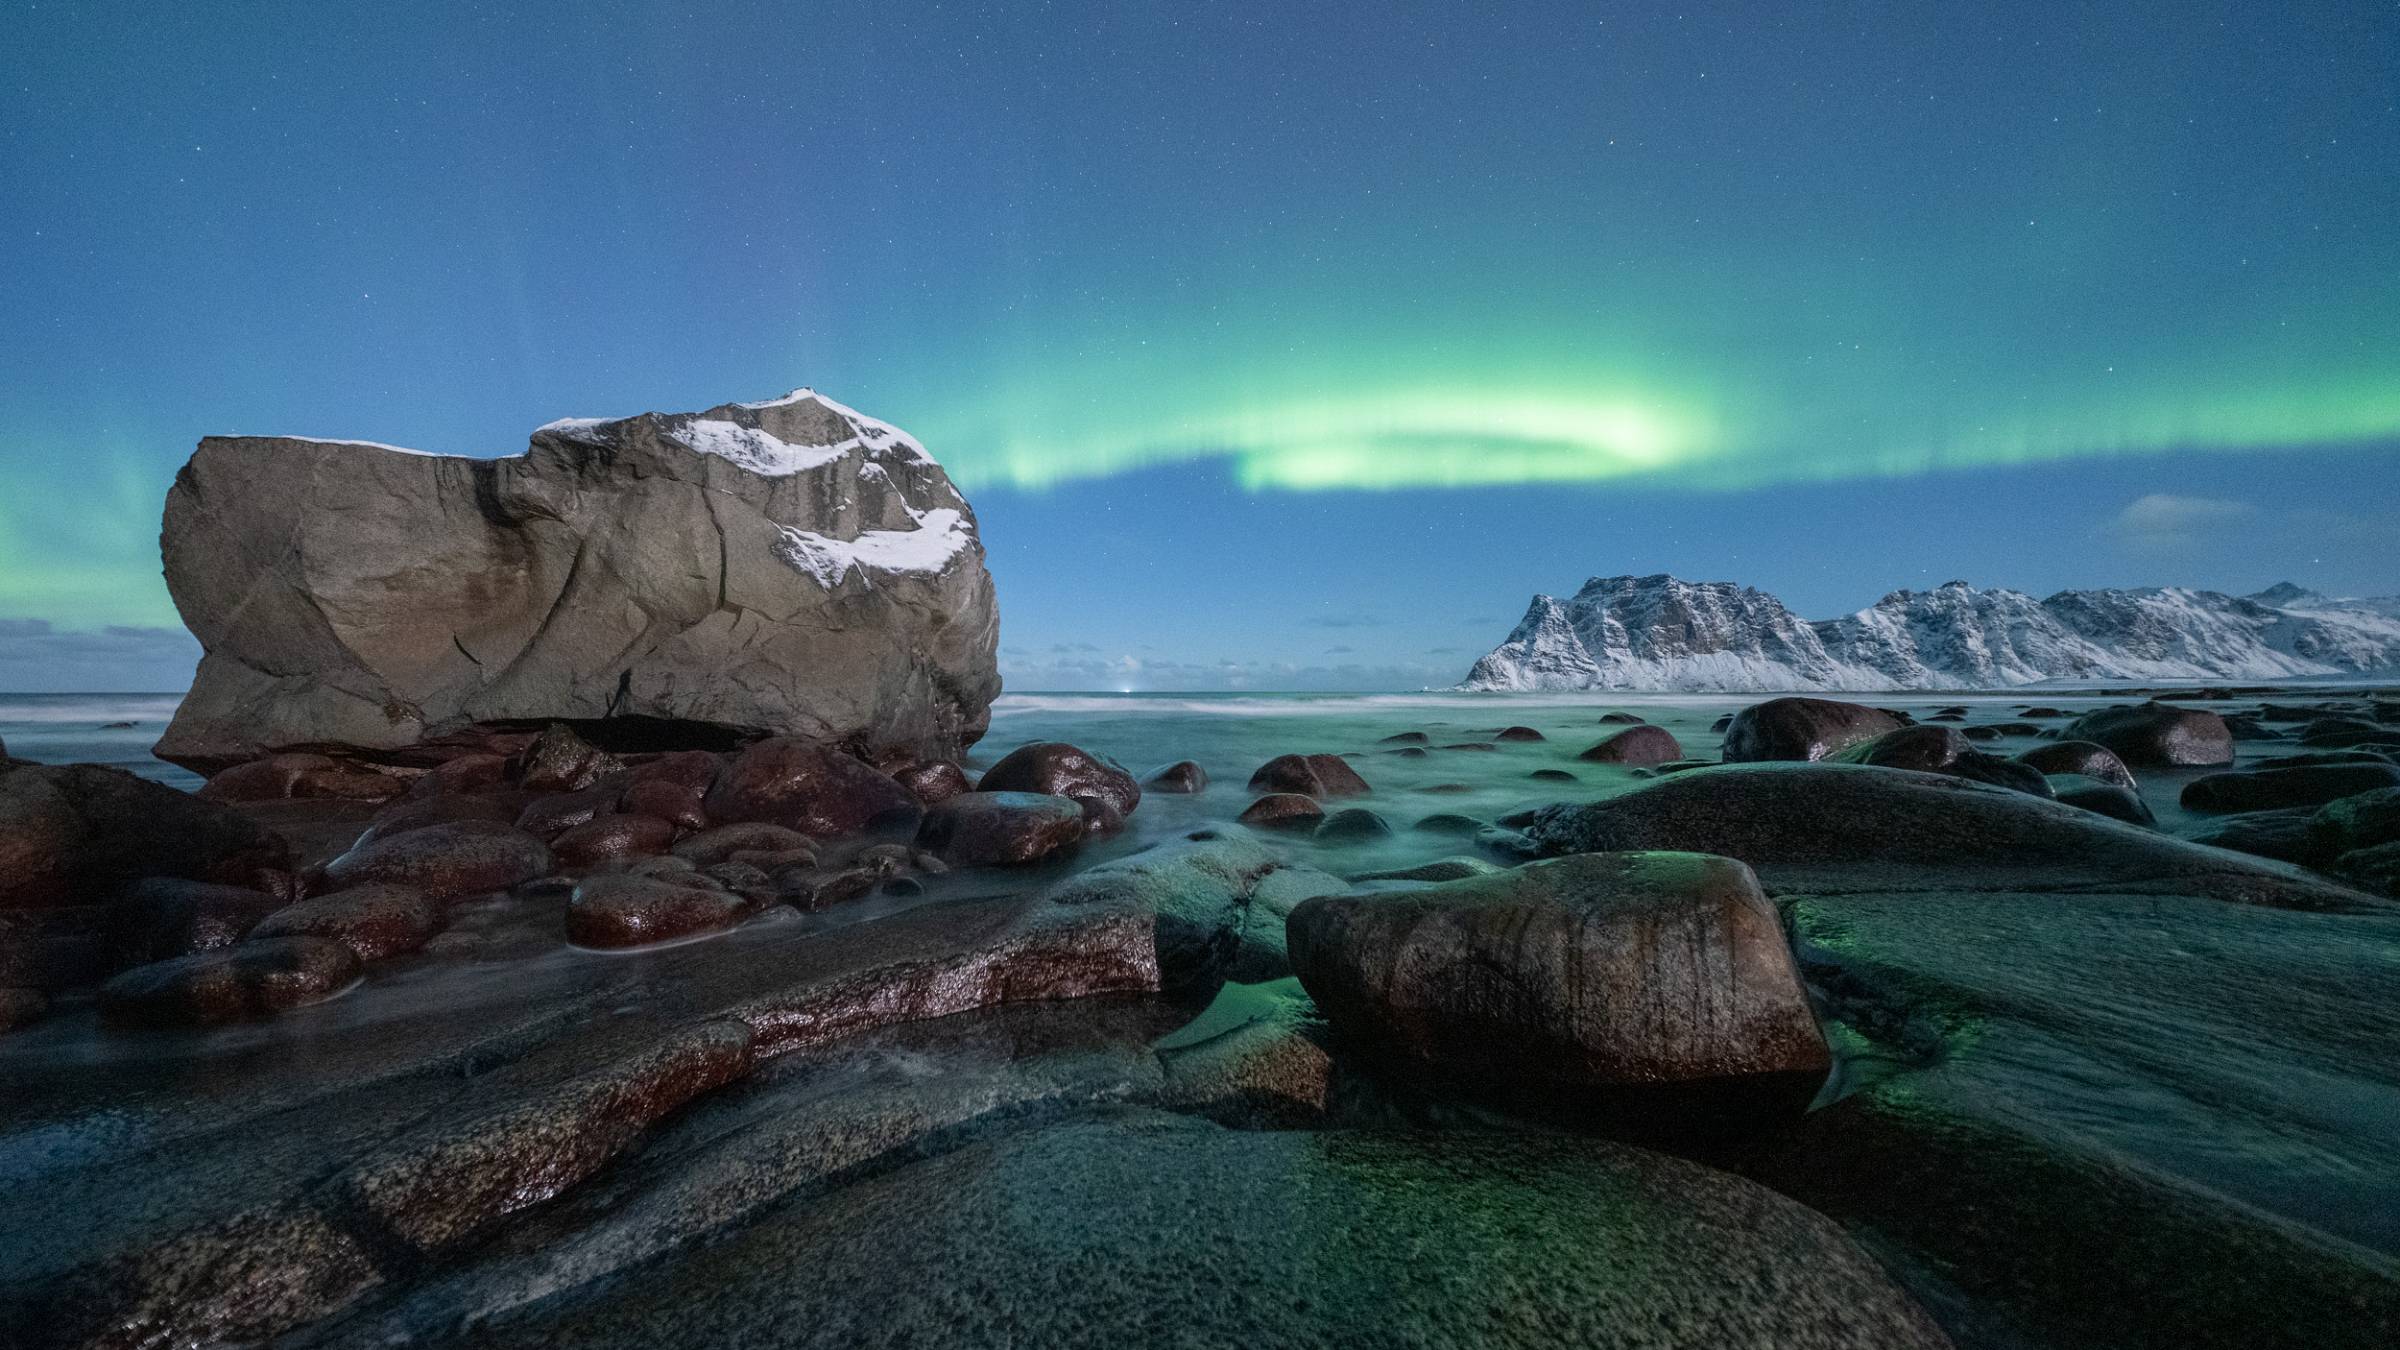
Example 1: High ISO, clear clipping risk
Camera: Nikon D750
Settings: 10 s, f/2.8, ISO 5000
This is a good example of how problems can start. The exposure was simply too aggressive for the scene. ISO 3200 might already have been enough, or the shutter speed could have been shortened. Instead, the brighter aurora structures were pushed too far, and the file lost room where I needed it most.
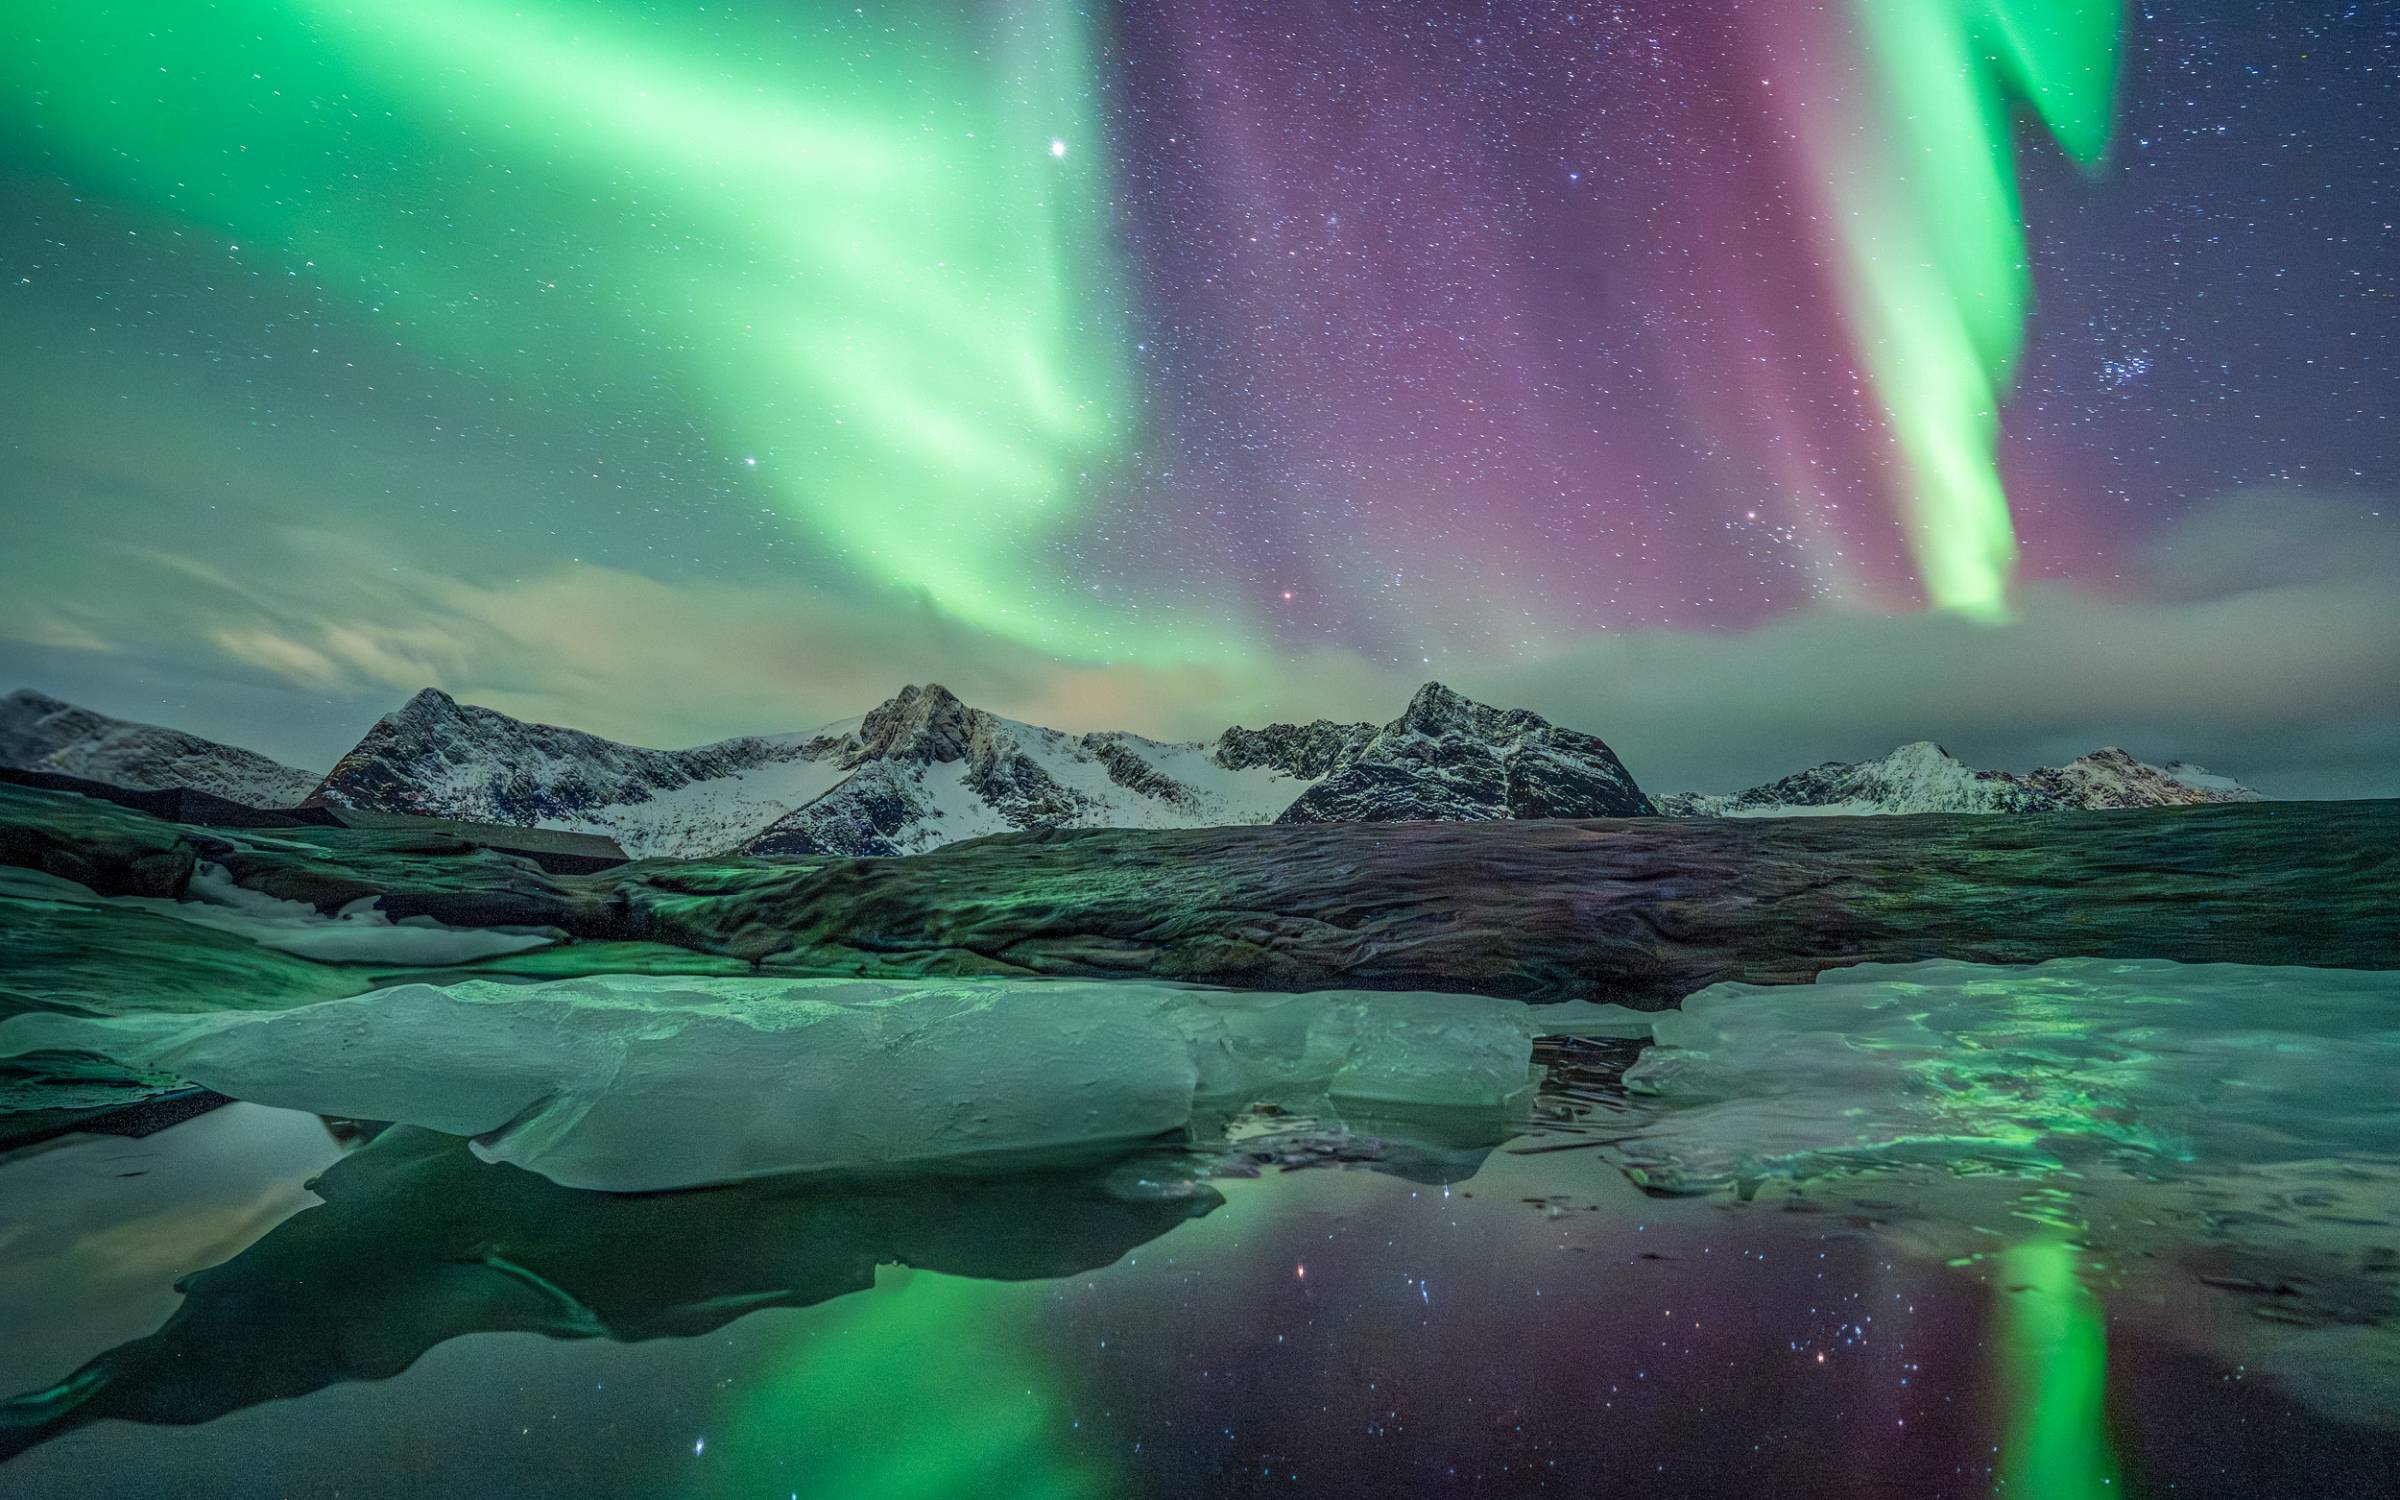
Example 2: Weak aurora, but still close to clipping
Camera: Nikon Z7 II
Settings: 6 s, f/2.8, ISO 3200
What makes this frame interesting is that the aurora was not even very strong. And still the file was already close to clipping, roughly about one stop away. That is exactly the kind of image that changed my thinking. If a weak display already leaves so little reserve at ISO 3200, why should I start there by default?
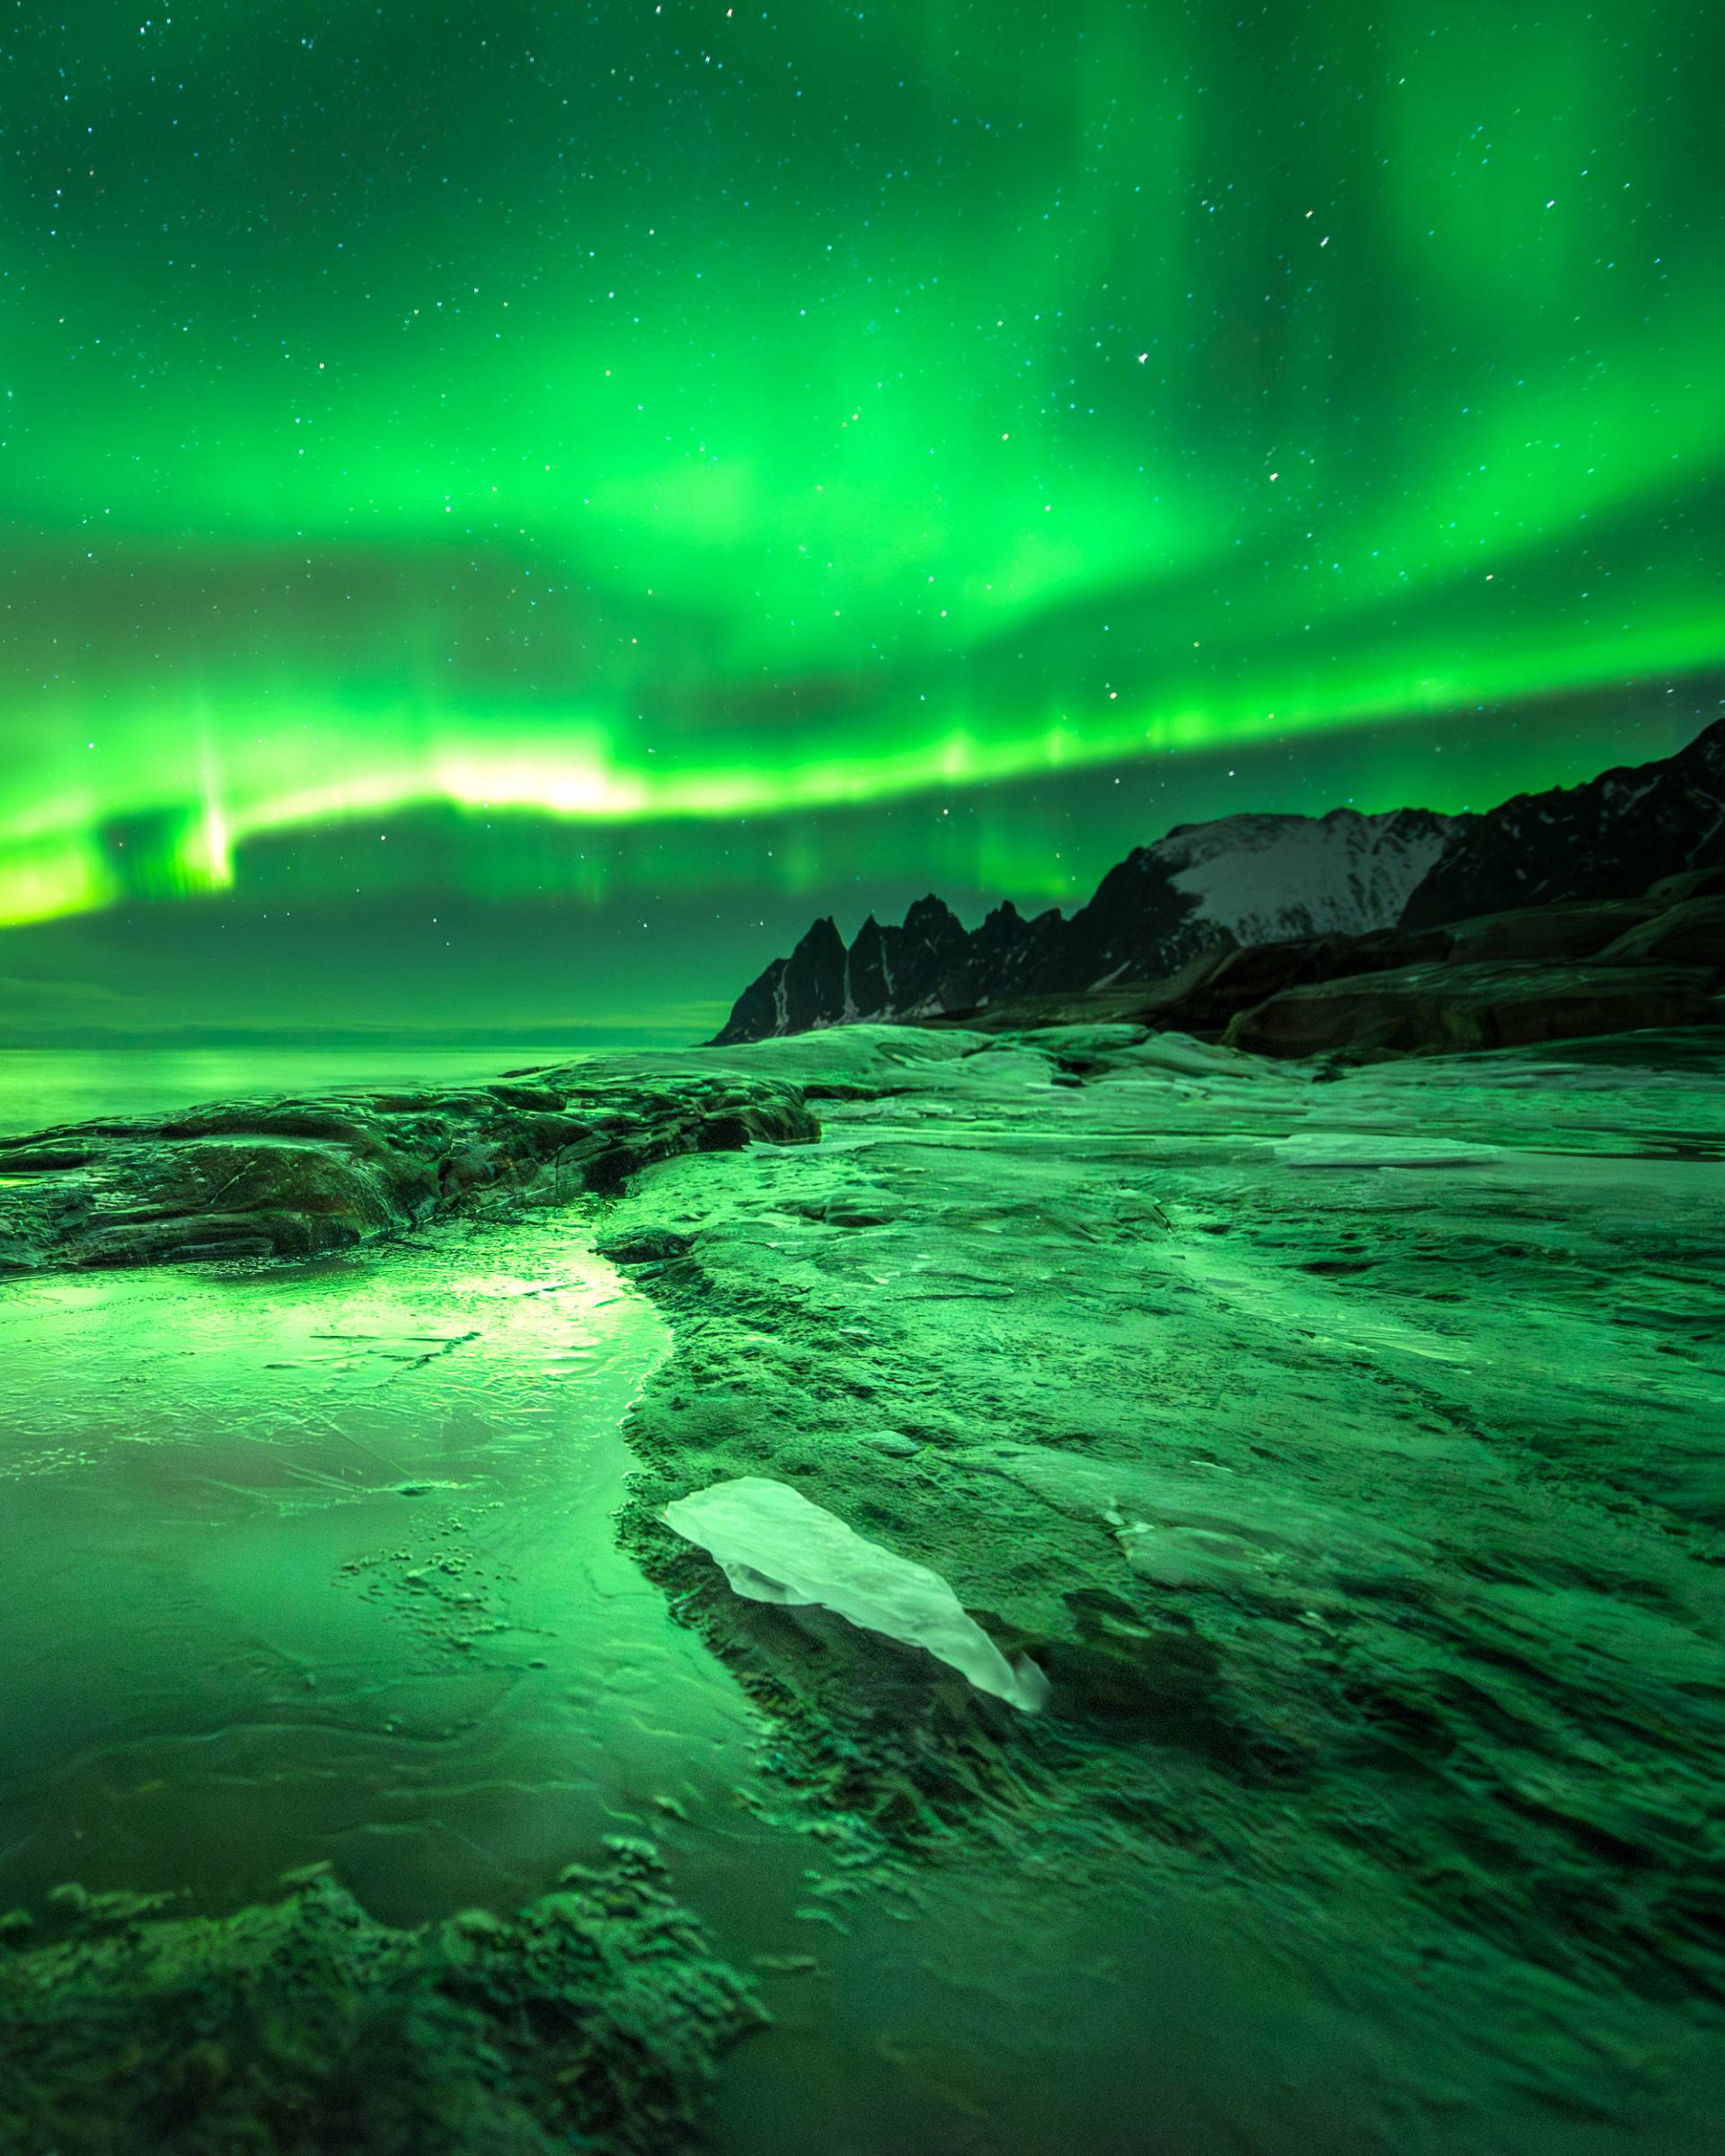
Example 3: Lower ISO, bright aurora, highlights preserved
Camera: Nikon Z5 astromod
Settings: 4 s, f/2, ISO 1000
This is much closer to how I prefer to work today. The aurora was bright, but the lower ISO helped keep the strongest parts under control. That gave me more room for editing later and made it much easier to preserve detail in the brightest areas instead of fighting blown highlights.
What about the dark preview on the camera?
This is the most obvious argument against lower ISO, and it is a fair one.
Yes, the preview gets darker. Yes, that can make judging the scene harder. And yes, focusing can be more annoying on some cameras.
There are a few practical ways around that:
- Some cameras offer stronger live-view amplification modes. Nikon's newer cameras, for example, have features like Starlight View that can help a lot.
- You can make a quick test exposure at a higher ISO to judge framing or brightness, then return to your working ISO.
- You can choose a practical compromise. On a camera like the D750, ISO 100 may be technically valid, but ISO 400 or 800 can still make more sense in the field.
So this is not a purist argument. I am not saying you must always shoot as low as physically possible. I am saying that many photographers start too high and lose highlight headroom for little benefit.
When raising ISO still makes sense
There are situations where I would still raise ISO.
If the aurora stays weak, if the foreground is very dark, if the movement is fast enough that I cannot lengthen the shutter much more, then a higher ISO can absolutely be the right call. The difference is that I now treat that as a conscious choice, not as the automatic default.
My rule is simple: start lower, watch the file, and raise ISO only when the aurora stays weak and the histogram allows it.
Why this matters even more for interval shooting and timelapse
This approach becomes even more useful when you shoot intervals or build a timelapse. In that situation, you often do not want to touch the camera every few seconds. And if the aurora suddenly gets stronger, a high fixed ISO can ruin an entire stretch of frames.
With a lower starting ISO, you keep more safety margin. The sequence may look a bit darker at first, but that is usually easy to correct later in post. What is much harder to fix is a beautiful peak of activity with clipped green highlights and no detail left in the brightest parts.
For me, that is one of the strongest practical arguments in favor of lower ISO for aurora. It reduces stress in the field and gives me a more robust sequence afterwards.
Final thoughts
I am not claiming there is one perfect aurora ISO. There is not. It depends on the camera, the brightness of the display, the speed of the movement, the moonlight, the foreground, and your own workflow.
But I do think one piece of common advice deserves more pushback: the idea that you should routinely start at ISO 1600, 3200 or 6400 just because it is dark.
In many cases, that is simply more ISO than you need.
Modern cameras give us a lot of room in RAW files. If you use that room wisely, a lower ISO can protect the highlights, give you more flexibility when the aurora suddenly intensifies, and make your files easier to handle later.
So yes, sometimes the better aurora image starts with less ISO, not more.
If you want to understand the sensor side in more detail, take a look at Alex Cooke's article on dual gain ISO and the Photons to Photos dynamic range charts.
Remark
The thoughts behind this article are fully my own. I am not a natural writer, but I still want to share what I have learned in the field. To make the article easier to read, I used AI to help polish the text.